I saw the simplest video ever for making ocean waves, and I just had to share the link with you.
I subscribe to an free e-zine (electronic magazine) called BakeMark's Bakin N Rockin. In the July 2011 issue is a video on how to create ocean waves on cakes. It is straight forward and simple. All you will need to create this ocean wave is a styrofoam cup and an airbrush system (if you don't have an airbrush system you could probably also use Wilton's Color Mist.
Here is the link: link
Sunday, August 21, 2011

Saturday, August 20, 2011
Totally ashamed for my absense
I have to say that I am both amazed at how fast the time has gone by and ashamed that I haven't kept up with my blog.
I seriously hate excuses, but I find that I must offer the only one that I have. The company that I work for has had us on mandatory overtime for months, and I also have been in the process of moving. So there you have it. My time has been very occupied over the past few months. I thought I would make amends by offering up a couple of recipes totally not related to cake, but sound very interesting.
These recipes were supplied to me from Bakerella. She always does such fun stuff. You might want to check out her website at www.bakerella.com. The first recipe is for homemade gumdrops and the second is for Nutter Butter Peanut Butter Pie.
Goodie Goodie Gumdrops
4 Tbsp gelatin (that’s about 6 envelopes)
1 cup cold water
1 1/2 cups boiling water
4 cups sugar
1/4 tsp flavored extract like lemon or peppermint
1-2 drops food coloring (I used four colors)
extra sugar for coating
……………………………………………
3.75 X 6 inch treat bags
Goodie Goodie labels (print the Goodie Goodie pdf)
• In a large pot, soften gelatin in cold water for five minutes.
• Stir in boiling water until gelatin dissolves.
• Stir in sugar.
• Bring to a boil over medium-high heat and boil for 25 minutes. Stir constantly.
• Pour mixture into 4 – 3X5 pans.
• Add 1/4 tsp extract and 1-2 drops food color to each pan.
• Stir until thoroughly combined.
• Cover pan and chill overnight in the fridge.
• Cut gelatin mixture into 3/4 inch cubes using a knife dipped in hot water.
• The gelatin may pull, but continue cutting.
• Separate cubes and roll in sugar until coated on all sides.
• Place gumdrops on wax paper and leave at room temperature for two days to crystallize.
Store in an airtight container.
Makes about 8 dozen 3/4 inch gumdrops.
You can also make 2 – 8X8 pans or 1 – 9X12 pan depending on the number of colors you want to make.
Adapted from the book, Celebrating Candy.
Nutter Butter and Chocolate Peanut Butter Pie
Prep Time: 15 Minutes | Cook Time: 7 Minutes | Difficulty: Easy | Servings: 8
Ingredients
• FOR CRUST
• 25 whole Oreos
• 4 Tablespoons Butter, Melted
• _____
• PEANUT BUTTER FILLING:
• 1 cup Creamy Peanut Butter
• 1 package (8 Ounce) Softened Cream Cheese
• 1-1/4 cup Powdered Sugar
• 1 package (8 Ounce) Cool Whip, Thawed
• 1 package Nutter Butter Peanut Butter Cookies
Preparation Instructions
Crust:
Crush the Oreos until they’re fine crumbs. Pour melted butter over the top and stir with a fork to combine. Press into pie pan and bake at 350 degrees for 5 to 7 minutes, or until set.
Remove from oven and allow to cool completely.
Filling:
Beat the peanut butter with the cream cheese until smooth. Add powdered sugar and beat until smooth. Add in the thawed Cool Whip and beat mixture until smooth, scraping the sides as needed.
Pour about half of the filling into crust, lay in a layer of Nutter Butter Peanut Butter cookies and pour in remaining filling, evening out the top with a knife or spatula. Chill for at least an hour before serving.
Warning: This is ultra, ultra-rich. Cut small slivers—your guests will thank you!
I hope this will make up for my absense, and I will try to be more diligent. You know how it is though when you are a working outside the home, wife, mother and grandmother. Duty calls all to often, because someone always needs something. I would like to end this by say I enjoy the time I do put into this blog though both for my own relaxation and for the benefit of others.
I seriously hate excuses, but I find that I must offer the only one that I have. The company that I work for has had us on mandatory overtime for months, and I also have been in the process of moving. So there you have it. My time has been very occupied over the past few months. I thought I would make amends by offering up a couple of recipes totally not related to cake, but sound very interesting.
These recipes were supplied to me from Bakerella. She always does such fun stuff. You might want to check out her website at www.bakerella.com. The first recipe is for homemade gumdrops and the second is for Nutter Butter Peanut Butter Pie.
Goodie Goodie Gumdrops
4 Tbsp gelatin (that’s about 6 envelopes)
1 cup cold water
1 1/2 cups boiling water
4 cups sugar
1/4 tsp flavored extract like lemon or peppermint
1-2 drops food coloring (I used four colors)
extra sugar for coating
……………………………………………
3.75 X 6 inch treat bags
Goodie Goodie labels (print the Goodie Goodie pdf)
• In a large pot, soften gelatin in cold water for five minutes.
• Stir in boiling water until gelatin dissolves.
• Stir in sugar.
• Bring to a boil over medium-high heat and boil for 25 minutes. Stir constantly.
• Pour mixture into 4 – 3X5 pans.
• Add 1/4 tsp extract and 1-2 drops food color to each pan.
• Stir until thoroughly combined.
• Cover pan and chill overnight in the fridge.
• Cut gelatin mixture into 3/4 inch cubes using a knife dipped in hot water.
• The gelatin may pull, but continue cutting.
• Separate cubes and roll in sugar until coated on all sides.
• Place gumdrops on wax paper and leave at room temperature for two days to crystallize.
Store in an airtight container.
Makes about 8 dozen 3/4 inch gumdrops.
You can also make 2 – 8X8 pans or 1 – 9X12 pan depending on the number of colors you want to make.
Adapted from the book, Celebrating Candy.
Nutter Butter and Chocolate Peanut Butter Pie
Prep Time: 15 Minutes | Cook Time: 7 Minutes | Difficulty: Easy | Servings: 8
Ingredients
• FOR CRUST
• 25 whole Oreos
• 4 Tablespoons Butter, Melted
• _____
• PEANUT BUTTER FILLING:
• 1 cup Creamy Peanut Butter
• 1 package (8 Ounce) Softened Cream Cheese
• 1-1/4 cup Powdered Sugar
• 1 package (8 Ounce) Cool Whip, Thawed
• 1 package Nutter Butter Peanut Butter Cookies
Preparation Instructions
Crust:
Crush the Oreos until they’re fine crumbs. Pour melted butter over the top and stir with a fork to combine. Press into pie pan and bake at 350 degrees for 5 to 7 minutes, or until set.
Remove from oven and allow to cool completely.
Filling:
Beat the peanut butter with the cream cheese until smooth. Add powdered sugar and beat until smooth. Add in the thawed Cool Whip and beat mixture until smooth, scraping the sides as needed.
Pour about half of the filling into crust, lay in a layer of Nutter Butter Peanut Butter cookies and pour in remaining filling, evening out the top with a knife or spatula. Chill for at least an hour before serving.
Warning: This is ultra, ultra-rich. Cut small slivers—your guests will thank you!
I hope this will make up for my absense, and I will try to be more diligent. You know how it is though when you are a working outside the home, wife, mother and grandmother. Duty calls all to often, because someone always needs something. I would like to end this by say I enjoy the time I do put into this blog though both for my own relaxation and for the benefit of others.
Sunday, May 29, 2011
Cake Designers beware!
I recently had an issue arise that I wanted to make my readers aware of. I post this for the people that, although they are new cake designers, they sell cakes to others.
I don't sell my cakes so to speak. I only charge for the ingredients, so that I might get some practice at something I really enjoy doing as a hobby. I can't afford to make all the cakes I make, and I can't eat all the cake I need to make in order to get practice. This is why I do cakes for family and friends and only charge for ingredients. It is a win/win situation for everyone involved.
But recently, I had an incident that crushed me to the core, and I wanted to share it with you for a couple of reasons. First, because I needed a forum to vent my frustration and two, because I would really hate to see this catch someone else unaware as it caught me.
I would like to know what you would do in this situation:
How do you respond to this: 1) "cake customer" orders a cake at last minute, 2) picks up a day early (thank goodness I just finished it), 3) you only charge them for ingredients (someone I know), 4) calls and tells you cake collapsed and they had to buy another cake from Walmart, 5) you find out that this cake (a wedding cake to boot) was not only not collapsed, but also eaten and enjoyed by wedding party. 6) bride cries when she finds out what her friend (the one that ordered the cake) had done and this makes cake maker feel like crap even though she didn't do it intentionally. How should the cake designer respond? Please let me know how you would feel, and how you would respond.
I would also like to add this...the cake "customer" was a family relative who purchased the cake for a "family friend" who was the bride the cake was for. The cake designer found out that the cake didn't collapse and was eaten by the wedding party from the "family friend" at the cake designer's niece's wedding where all three were in attendance. Now "family friend" is upset that "customer" lied to the cake designer about her cake, and cake designer is upset with "customer" because she lied to her. Especially since the "cake designer" can't say anything to the "customer" at her niece's wedding, because she doesn't want to cause a disturbance there.
Sounds like a soap box opera...doesn't it. Well, I just wanted others to be aware that just because a cake is for a family member don't think that everything will go smoothly. Sometimes family members can be the worse people to fix cakes for. I don't have any further contact with the "customer", and I will never make her another cake...ever. I just wanted to vent, and I needed a place to vent. I was very upset by the whole situation since she lied, but she also went around and trashed my cake making skills to everyone. I am new to this whole thing, so I am very self-conscious anyway. When I had this happen, I almost said to the devil with it, I am not making any more cakes. But, I have since calmed down and I try not to let the stupidity of ONE person sway my desire to learn. Wedding cakes are a really big deal, and to think you made a bride do without a wedding cake, or to have to have a chain store bought cake is devistating. I thought I messed up this bride's wedding day, and you can imagine how that made me feel, only to learn that the customer lied to me.
BEWARE!
I don't sell my cakes so to speak. I only charge for the ingredients, so that I might get some practice at something I really enjoy doing as a hobby. I can't afford to make all the cakes I make, and I can't eat all the cake I need to make in order to get practice. This is why I do cakes for family and friends and only charge for ingredients. It is a win/win situation for everyone involved.
But recently, I had an incident that crushed me to the core, and I wanted to share it with you for a couple of reasons. First, because I needed a forum to vent my frustration and two, because I would really hate to see this catch someone else unaware as it caught me.
I would like to know what you would do in this situation:
How do you respond to this: 1) "cake customer" orders a cake at last minute, 2) picks up a day early (thank goodness I just finished it), 3) you only charge them for ingredients (someone I know), 4) calls and tells you cake collapsed and they had to buy another cake from Walmart, 5) you find out that this cake (a wedding cake to boot) was not only not collapsed, but also eaten and enjoyed by wedding party. 6) bride cries when she finds out what her friend (the one that ordered the cake) had done and this makes cake maker feel like crap even though she didn't do it intentionally. How should the cake designer respond? Please let me know how you would feel, and how you would respond.
I would also like to add this...the cake "customer" was a family relative who purchased the cake for a "family friend" who was the bride the cake was for. The cake designer found out that the cake didn't collapse and was eaten by the wedding party from the "family friend" at the cake designer's niece's wedding where all three were in attendance. Now "family friend" is upset that "customer" lied to the cake designer about her cake, and cake designer is upset with "customer" because she lied to her. Especially since the "cake designer" can't say anything to the "customer" at her niece's wedding, because she doesn't want to cause a disturbance there.
Sounds like a soap box opera...doesn't it. Well, I just wanted others to be aware that just because a cake is for a family member don't think that everything will go smoothly. Sometimes family members can be the worse people to fix cakes for. I don't have any further contact with the "customer", and I will never make her another cake...ever. I just wanted to vent, and I needed a place to vent. I was very upset by the whole situation since she lied, but she also went around and trashed my cake making skills to everyone. I am new to this whole thing, so I am very self-conscious anyway. When I had this happen, I almost said to the devil with it, I am not making any more cakes. But, I have since calmed down and I try not to let the stupidity of ONE person sway my desire to learn. Wedding cakes are a really big deal, and to think you made a bride do without a wedding cake, or to have to have a chain store bought cake is devistating. I thought I messed up this bride's wedding day, and you can imagine how that made me feel, only to learn that the customer lied to me.
BEWARE!
Saturday, May 21, 2011

Comment on the recipe of the month
I recently was requested to do a lemon cake with lemon filling. So, I thought I would try out a new recipe using the recipe of the month. I was not disappointed.
First, I used Duncan Hines Moist Deluxe Lemon Cake mix and sifted the dry mix with 1 cup of flour, 1 cup of sugar, and 1 large box of Jell-O lemon pudding mix.
Second, I mixed together in another bowl the water, oil, sour cream, egg, and lemon extract.
Third, I combined the two separate bowls, and I mix just until the liquid is absorbed in the dry ingredients. I scrape down the bowl, and I mix again just until the mix looks silky. Then I pour into my prepared cake pans (pans sprayed with non-stick spray and lined with wax paper or parchment paper). Bake at 325 degrees until a toothpick comes out with just a few crumbs on it.
I level using the tea towel method (see previous post) and cover the pan with aluminum foil after they have almost cooled completely in the pan. This will make the cake more moist (however, only do this if the cake will be used right away the extra moisture could make the cake go bad more quickly). Tort you cake and fill with lemon filling with a buttercream dam.
To make your lemon filling use the juice and zest from 3 large lemons, 1 cup of sugar, 4 eggs and 1/2 cup butter. Place zest and sugar in a food processor and process until combined. Add lemon juice and eggs and process until smooth. Slowly add the butter to the mixture, pulsing as you go. Place in the top of a double bowler and cook over simmering water until thickened (about 5 minutes). Let the mixture cool completely. To apply to cake, using thick buttercream, make a dam around the outside edge of the torted cake (about a 1/4 of an inch from the outside edge) place the filling inside the dam. Place top layer on cake. Apply your crumb-coat (some call this dirty icing which just means to apply a thin layer of icing all over the cake to prevent crumbs from getting into your final icing.
Once you have applied your crumb-coat and allowed it to crust, you can apply your final coat of icing. The thickness will depend on whether you are adding fondant or just using buttercream. If I am applying fondant, I use a thinner layer of buttercream to prevent it from squishing from under the fondant. I apply a slightly thicker layer if I am using only buttercream.
Once the buttercream has crusted, you can apply your rolled out fondant. Smooth the fondant according to the fondant smoothing techniques I have posted in this blog. I made the lemon fondant by making marshmallow fondant and adding LorAnn Oils to it. Melt a 10 ounce bag of marshmallows with a tablespoon of water in the microwave for about 2 minutes (stirring after about 1 minute...*note this is important as it keeps the gelatin in the marshmallows from coagulating on the bottom of the bowl). Remove from microwave and add your flavoring and coloring. Stir in powdered sugar until it forms a stiff playdoh-type fondant. Let rest overnight before using (Note: this is also important, because the fondant will completely absorb the sugar and is easier to work with). Decorate as desired.
This was absolutely yummy.
First, I used Duncan Hines Moist Deluxe Lemon Cake mix and sifted the dry mix with 1 cup of flour, 1 cup of sugar, and 1 large box of Jell-O lemon pudding mix.
Second, I mixed together in another bowl the water, oil, sour cream, egg, and lemon extract.
Third, I combined the two separate bowls, and I mix just until the liquid is absorbed in the dry ingredients. I scrape down the bowl, and I mix again just until the mix looks silky. Then I pour into my prepared cake pans (pans sprayed with non-stick spray and lined with wax paper or parchment paper). Bake at 325 degrees until a toothpick comes out with just a few crumbs on it.
I level using the tea towel method (see previous post) and cover the pan with aluminum foil after they have almost cooled completely in the pan. This will make the cake more moist (however, only do this if the cake will be used right away the extra moisture could make the cake go bad more quickly). Tort you cake and fill with lemon filling with a buttercream dam.
To make your lemon filling use the juice and zest from 3 large lemons, 1 cup of sugar, 4 eggs and 1/2 cup butter. Place zest and sugar in a food processor and process until combined. Add lemon juice and eggs and process until smooth. Slowly add the butter to the mixture, pulsing as you go. Place in the top of a double bowler and cook over simmering water until thickened (about 5 minutes). Let the mixture cool completely. To apply to cake, using thick buttercream, make a dam around the outside edge of the torted cake (about a 1/4 of an inch from the outside edge) place the filling inside the dam. Place top layer on cake. Apply your crumb-coat (some call this dirty icing which just means to apply a thin layer of icing all over the cake to prevent crumbs from getting into your final icing.
Once you have applied your crumb-coat and allowed it to crust, you can apply your final coat of icing. The thickness will depend on whether you are adding fondant or just using buttercream. If I am applying fondant, I use a thinner layer of buttercream to prevent it from squishing from under the fondant. I apply a slightly thicker layer if I am using only buttercream.
Once the buttercream has crusted, you can apply your rolled out fondant. Smooth the fondant according to the fondant smoothing techniques I have posted in this blog. I made the lemon fondant by making marshmallow fondant and adding LorAnn Oils to it. Melt a 10 ounce bag of marshmallows with a tablespoon of water in the microwave for about 2 minutes (stirring after about 1 minute...*note this is important as it keeps the gelatin in the marshmallows from coagulating on the bottom of the bowl). Remove from microwave and add your flavoring and coloring. Stir in powdered sugar until it forms a stiff playdoh-type fondant. Let rest overnight before using (Note: this is also important, because the fondant will completely absorb the sugar and is easier to work with). Decorate as desired.
This was absolutely yummy.
Friday, April 22, 2011
Trying out the Lambeth Method
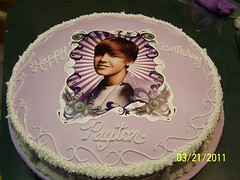
Well I finally got around to trying some of the Lambeth techniques (So to speak) on a cake for my granddaughter. Well kinda sort of. I didn't have a lot of time so I used a couple of the decorating techniques, but not in layers. After trying some of the icing methods I am even more determined to try some of these techniques. I just wish you could find more information about it on the internet. Classes really aren't an option for me at all right now. Oh well, I am getting off topic. I really like the looks of this on a cake, and I will be trying some more intricate stuff as I get the chance. Tell me what you think.
Monday, April 11, 2011
I can't believe it has been almost a month since my last post.
I have been so busy with work that I haven't had a chance to make any posts to my blog. I feel like I am really neglecting my followers. I do have a little good news though. I did manage to make a couple of cakes since my last post. The bad news is that I can't post them on my blog.
I did a couple of naughty cakes for a couple of friends. I don't particularly like doing these types of cakes, but I always feel obligated to give my friends what they ask for to a certain degree.
I don't post them to my blog, because I don't have any way of censoring who might see them. I usually post them to cakecentral.com, because they have a naughty forum. I realize that this doesn't prevent someone from seeing them that wants to badly enough, but if I were to post them here on my blog they would be out where anyone could see them.
So if you would like to see these two cakes, I apologize, but you will have to visit the naughty forum on cakecentral.com under cabecakes.
But at least I did get to make a couple of cakes. I'm surprise given the hours my company has had us working.
I do promise to try and be more diligent in the future about trying to post some new information for my followers though, and if you should have any questions regarding any of my cakes don't hestitate to ask.
I did a couple of naughty cakes for a couple of friends. I don't particularly like doing these types of cakes, but I always feel obligated to give my friends what they ask for to a certain degree.
I don't post them to my blog, because I don't have any way of censoring who might see them. I usually post them to cakecentral.com, because they have a naughty forum. I realize that this doesn't prevent someone from seeing them that wants to badly enough, but if I were to post them here on my blog they would be out where anyone could see them.
So if you would like to see these two cakes, I apologize, but you will have to visit the naughty forum on cakecentral.com under cabecakes.
But at least I did get to make a couple of cakes. I'm surprise given the hours my company has had us working.
I do promise to try and be more diligent in the future about trying to post some new information for my followers though, and if you should have any questions regarding any of my cakes don't hestitate to ask.
Subscribe to:
Posts (Atom)